✖ Installing Bundler error Your Ruby version is 2.6.10, but your Gemfile specified 2.7.5
ruby version error 해결
//루비버전관리 프로그램 설치
brew install rbenv
//나는 mac 유저라서 터미널에서 바로
code .
//쳐주면 .zshrc파일 들어갈 수 있음. 접근해서 맨밑에 추가함
eval"$(rbenv init -)"
//원하는 버전 설치
rbenv install 2.7.5
//설치완료 확인 (이제는 자동으로 해줘서 안해도 되는 명령어라고 함)
rbenv rehash
//버전 변경 (이것도 자동으로 해주는 거같음 )
rbenv global 2.7.5
//버전확인
ruby --version
//버전변경했는데도 자꾸 이전 버전이 뜬다면 터미널 껐다가 다시 버전체크해보자. 껐다 다시 킨 다음에야 나는 변경된 걸로 떴음
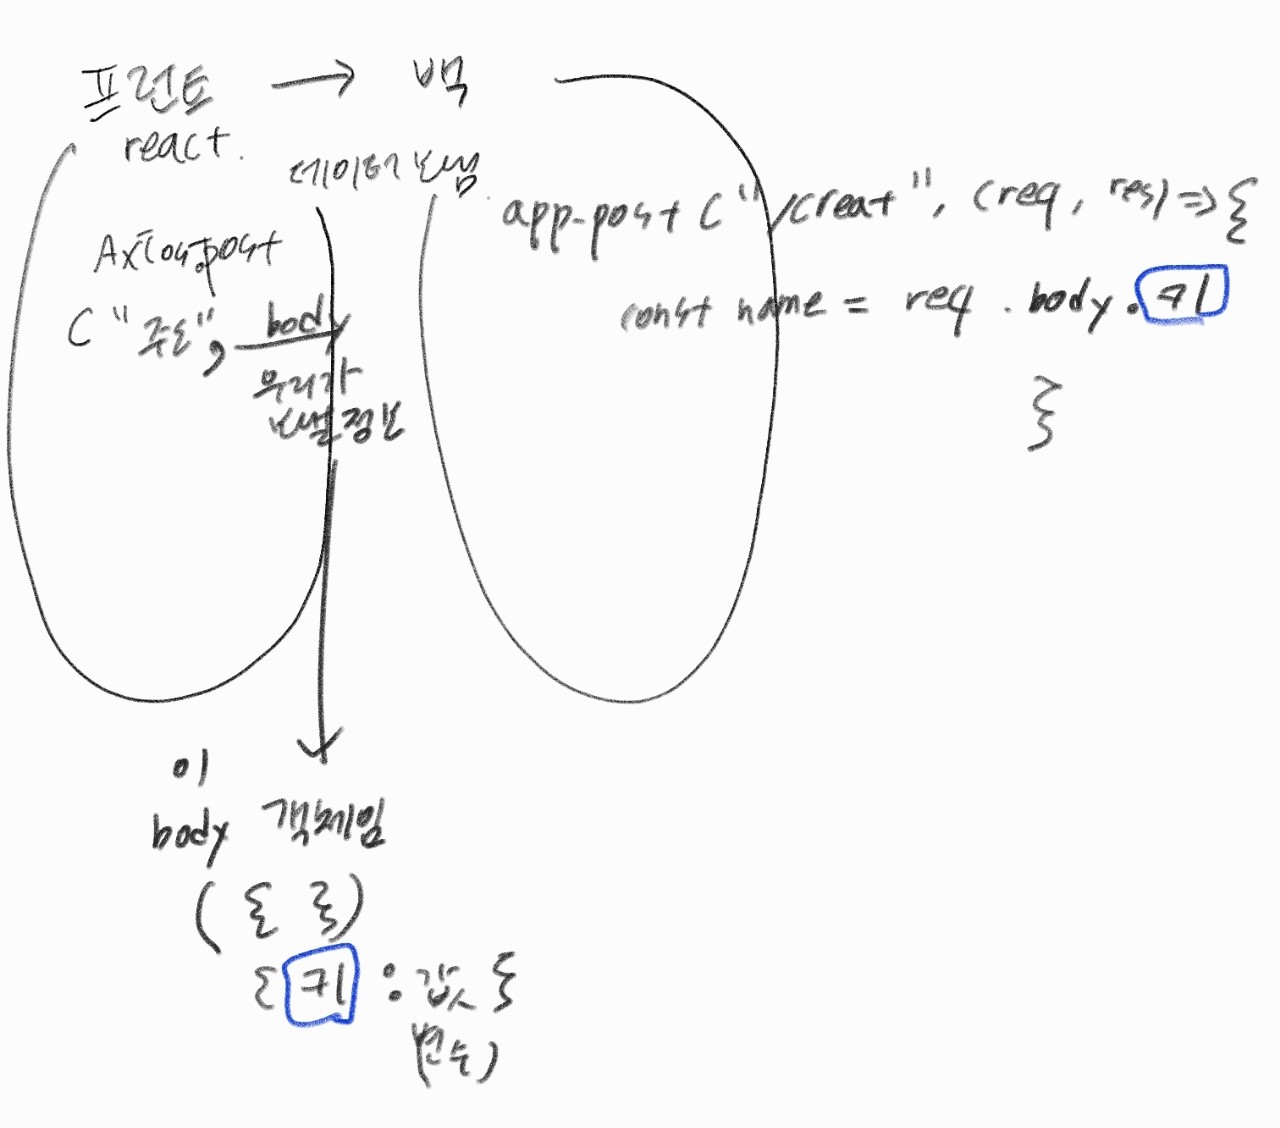
Error: Objects are not valid as a React child (found: object with keys {findFirstTransaction}). If you meant to render a collection of children, use an array instead.
  @media screen and (max-width: 1440px) {

  }
  @media screen and (max-width: 1024px) {

  }

  @media screen and (max-width: 400px) {

  }
최소영역은 반대
작은 영역에서 큰영역으로 순서 써야함..
중앙정렬
중앙정렬할 때
마진 오토가 안먹혀서 뭔가 했더니 가로값을 주어야했다!!
 position: fixed;
  /* fixed를 쓸 때에는 width, height를 명시해줘야 한다. */
  width: 460px
  /* left, right는 해당 요소의 위치 시작점을 결정한다. 그런데, 이때, margin의 양 값을 auto로 줌으로써 마진을 주어 해당 요소의 양 끝 위치를 각각 0으로 만들어준다. */
  margin: 0 auto;
  left: 0;
  right: 0;
Build optimization failed: found page without a React Component as default export in pages/types
error Command failed with exit code 1.
페이지마다 export default ,
default를 기본으로 하는애가 있어야한다고 이해해서
페이지 types에 없어서 그런가 해봤는데 해결안됨
오히려 타입안에 인터페이스에 default붙이니까 못읽음
찾아보다가
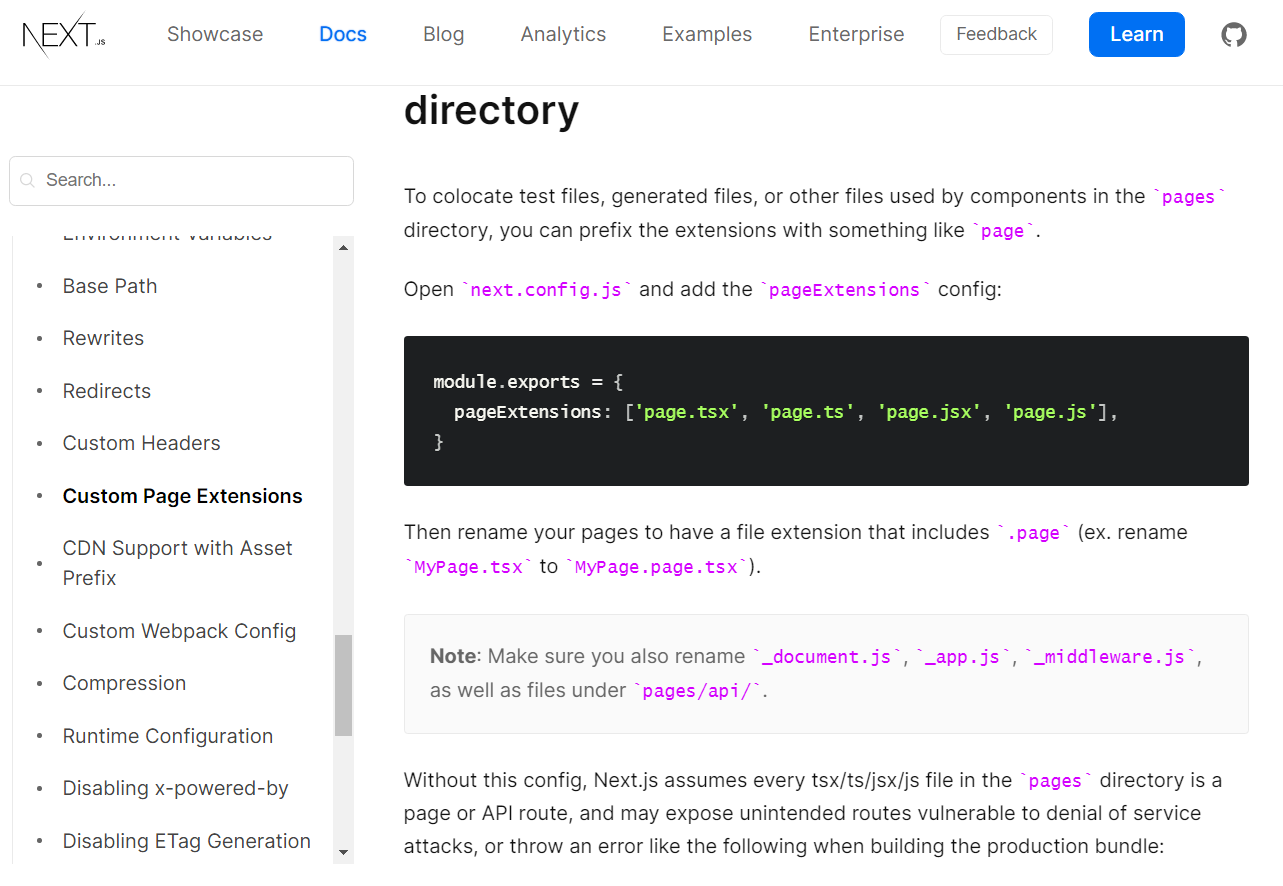
구성 요소를 페이지 폴더 외부로 이동해야 합니다. Pages/는 Next.js 라우팅이 구조를 기반으로 하므로 페이지 구성 요소에만 사용해야 합니다.
Next.js에는 페이지 개념을 기반으로 구축된 파일 시스템 기반 라우터가 있습니다.
파일이 페이지 디렉토리에 추가되면 자동으로 경로로 사용할 수 있습니다.
위의 동작이 기본 동작이지만 페이지 디렉토리에 페이지가 아닌 파일을 포함하도록 Next.js 앱을 구성할 수 있습니다.
이렇게 하려면 아래와 같이 next.config.js 파일의 pageExtensions 항목을 수정하면 됩니다. 그런 다음 .page(_document.page.js, _app.page.js, index.page.js 등)를 포함하는 파일 확장자를 갖도록 페이지 구성 요소의 이름을 바꿉니다.
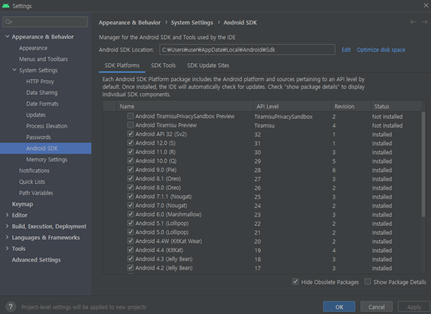
error failed to launch emulator. Reason:No emulators found as an output of `emulator -list-avds`
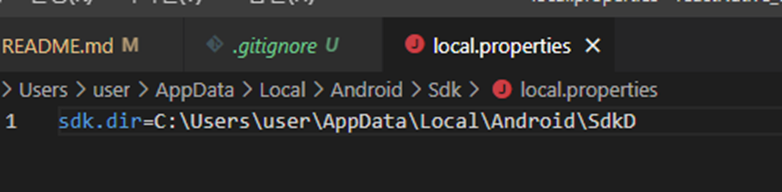
Could not determine the dependencies of task ':app:compileDebugJavaWithJavac'. > SDK location not found. Define location with an ANDROID_SDK_ROOT environment variable or by setting the sdk.dir path in your project's local properties file